How to setup email forwarding using Cloudflare
Cloudflare is a global content delivery network that you can use to do email forwarding on your custom domain. And the best part: it’s free! All you need to get started is a custom domain (say, example.com), and a free account at Cloudflare. In this article, we will setup Cloudflare to perform the DNS resolution for your domain, and configure the email routing. At the end, I’ll show a more advanced usage of this to setup so-called canary email addresses.
Let Cloudflare manage the domain’s DNS records Link to heading
Given that you have your custom domain example.com and a free Cloudflare account, the first step is to allow Cloudflare to manage the DNS records for your domain. DNS is the Domain Name System, which resolves domain names such as example.com to their corresponding IP-addresses such as 103.21.244.1. Usually, the domain provider where you registered your domain will manage the DNS records for you, by using their own nameservers where the DNS records are stored. You can see these nameservers and records if you go to a website such as
who.is and enter your domain name. However, you can change the nameservers for your domain to be Cloudflare’s, and therefore let Cloudflare manage the domain’s DNS records. This can be set up in minutes, and after a day or so the whole internet will be aware of the change. And if in the end you don’t like it, you can easily switch back.
For this step I would like to refer you to Cloudflare’s own extended tutorial, but the gist is:
- Login into your Cloudflare dashboard.
- Add the domain to Cloudflare. It will try to copy the existing DNS records as well as it can, but ensure they are correct and complete. At this point, Cloudflare is not yet managing the domain.
- Click your added domain and find Cloudflare’s nameservers that you have to use, for example
alfa.ns.cloudflare.comandbravo.ns.cloudflare.com. Note that only the specific nameservers mentioned in Cloudflare’s dashboard are the only ones that will work. - Update the nameservers of your domain to those of Cloudflare. The exact steps depend on your current registrar. Most offer an option in their dashboard, some require you to contact customer support.
- Within 24 hours your registrar will have updated the nameservers for your domain and Cloudflare will be authoritative for managing the domain’s DNS records.
Setup email routing Link to heading
Now we are going to setup Cloudflare’s email routing. We will create rules that handle every email sent to your domain, and forward it to the actual email address you desire.
- Login into your Cloudflare dashboard and go to your domain settings.
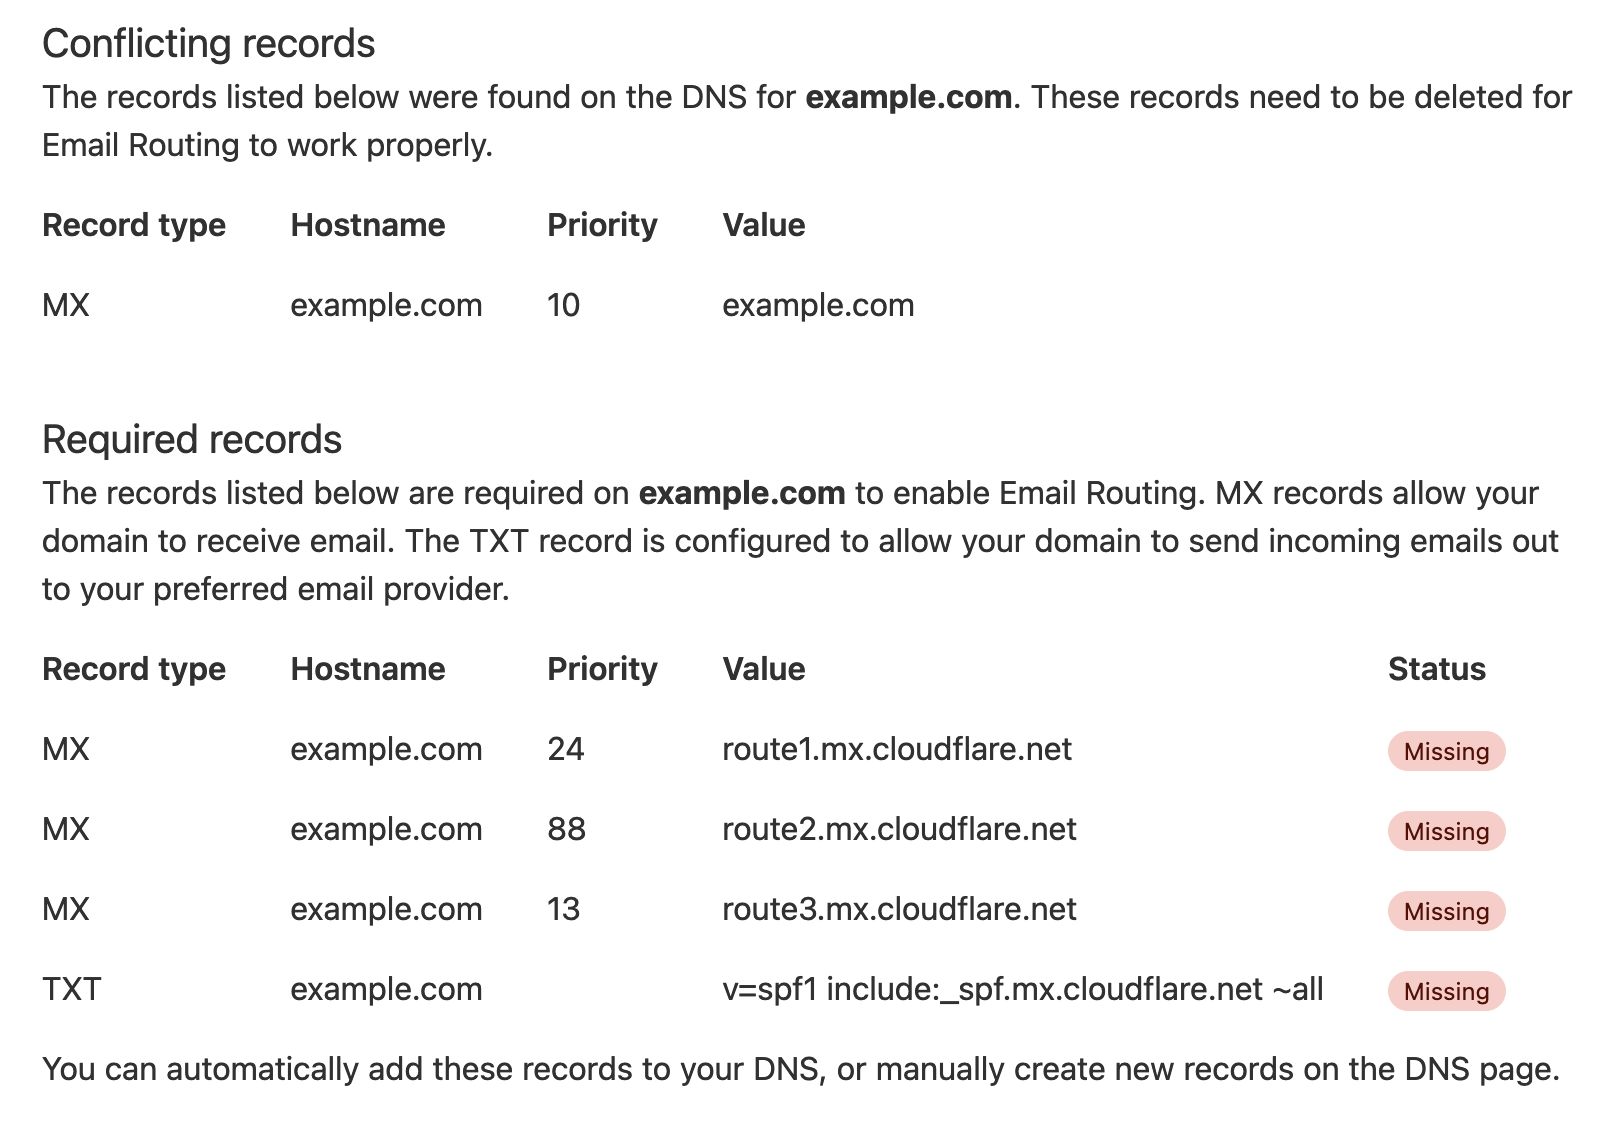
- Go to the Email page on the left. You will see a page about how to Get started with Email Routing. It will explain that some DNS records (specifically the
MXrecords used for email routing) are conflicting (moved over from your registrar) or missing (i.e., not using Cloudflare). - If you have conflicting records, you’ll have to remove them on the DNS page. Then, go back to the Email page.
- Click the Add records and enable button to add the missing DNS records.
It might take up to a day for the changes to the DNS records to be propagated. Now that the DNS records have been fixed, it’s time to setup an email route.
- On the Email page, go to the Routes tab.
- Click Create address to create a new routing address.
- Enter the first part of the email address, and what to do with it. Usually, you’d want to forward the emails, but you can also choose to drop them. Let’s add a personal email address and click Save.
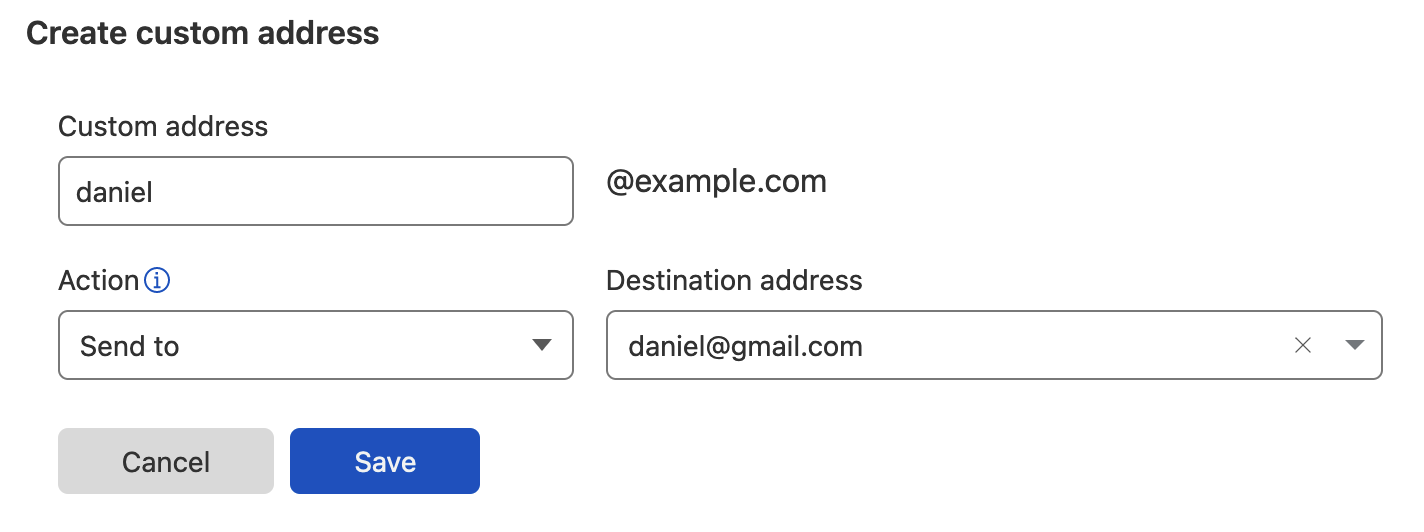
Now you’re done! You should be able to verify that this works by sending an email to daniel@example.com and receiving it in your mailbox. You can add as many email addresses as you want. Any email address that is unknown will be handled by the Catch-all route. By default this will Drop those emails, as they are presumed to have been sent to the wrong email address.
Canary email addresses Link to heading
A canary email address is a custom address that you use only for one particular service or website. The idea is that if you see other emails arrive on that canary address, you know that the service or website has been compromised or has been leaking or selling your personal information. For example, if I create an email address twitter@example.com with which I register at Twitter, and I see spam arriving on this email from, say, Amazon, then I know that Amazon somehow obtained this email address from Twitter without my consent.
When using Gmail, one way to create canary email addresses is to add the service’s name as a suffix to the account name, separated by a plus sign. For example, daniel+twitter@gmail.com. However, spammers and scammers also know this trick and they will often automatically remove the suffix, sending email to daniel@gmail.com and leaving me none the wiser. So the advantage of using your own domain and custom email addresses here, is that malicious third-parties cannot easily reconstruct a non-canary email address that has the same destination.
Of course, this would involve adding many email routes to your domain at Cloudflare, one for each service you’re using. Instead of adding twitter@example.com, facebook@example.com and many more, I propose using the Catch-all functionality instead.
- In the Email page of your domain at Cloudflare, on the Routes tab, go to the Catch-all address section.
- Edit the action, change it from Drop to Send to and enter your email address.
- Then enable the Catch-all address switch.
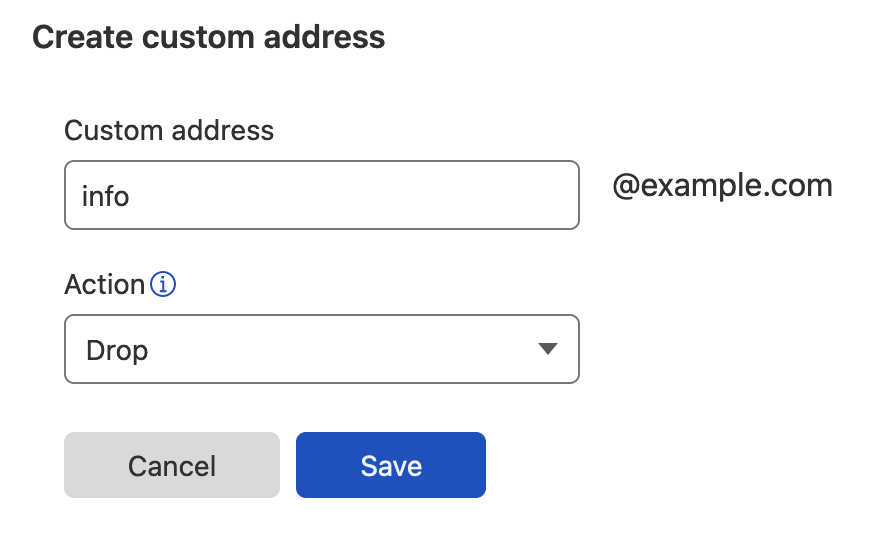
Now we can make up any email address and all will arrive in our mailbox. However, addresses such as info@example.com that commonly receive spam will also be forwarded to your mailbox. So we will add another email route to drop all emails to this address.
- On the same page, click the Create address button.
- Enter
infoas the custom address, forming the full email addressinfo@example.com. - For Action, select Drop.
- Click Save.
Now you have your own personalized email address forwarded to the mailbox of your choice, and the ability to use canary email addresses if you want.